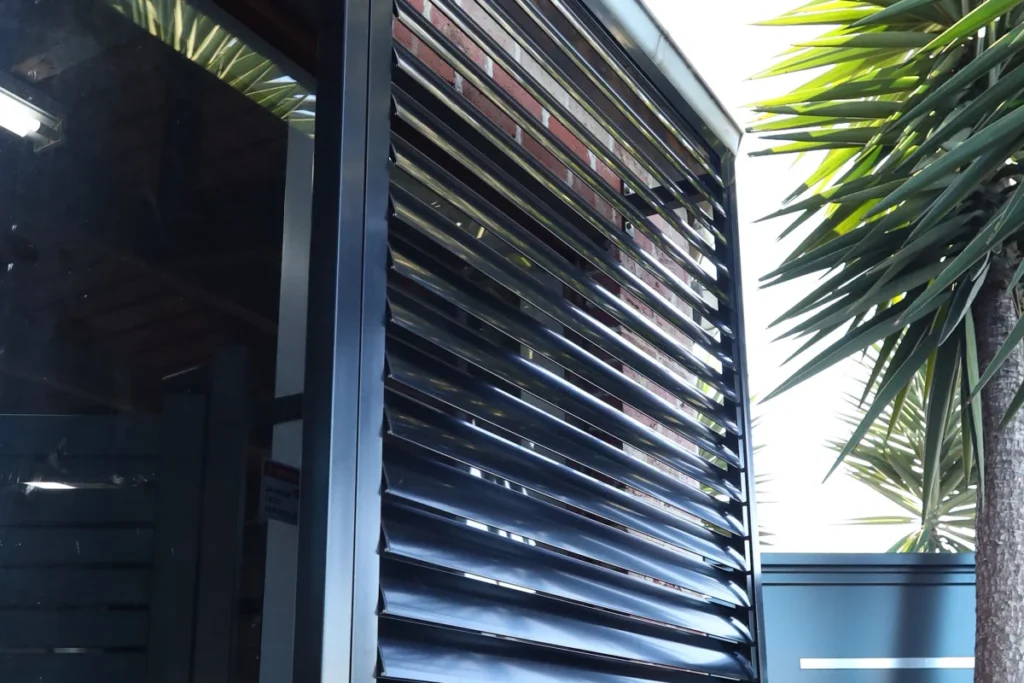
A louvre privacy screen is an ideal choice if you want to improve your home’s outdoor privacy without sacrificing light or airflow. These angled slat panels are commonly used in patios, balconies and gardens. They allow you to enjoy your space comfortably while keeping out unwanted views. With the right tools and preparation, you can install a screen yourself over the weekend. It’s a simple yet effective project for anyone interested in home renovation.
Tools and Materials Needed
Before starting, gather these items:
- Measuring tape
- Drill with drill bits
- Brackets and rust-proof screws
- Pre-cut louvre blades or screen panels
- A sturdy frame (timber or aluminium)
- Spirit level
- Pencil or chalk for marking
- Safety goggles and gloves
Choosing materials suited to your climate will ensure the installation lasts. Try to opt for treated timber or powder-coated aluminium for better durability outdoors.
Step-by-Step Installation Process
Follow these straightforward steps to install your louvre privacy screen safely and correctly:
1. Measure and Mark Your Area
Pick the spot for the screen. Use a tape measure to get accurate dimensions. Mark the space clearly, ensuring the top and bottom lines are level.
2. Prepare the Surface
Clean the wall or ground where the screen will go. For concrete or brick, brush off loose debris and confirm the surface is firm. This helps in proper fitting and long-term use.
3. Build the Frame and Insert Blades
Assemble the frame per the instructions. Slide the louvre blades into position. Ensure each blade is positioned at a consistent angle to maintain airflow and privacy. For adjustable blades, set them as needed.
4. Install the Screen Securely
Lift the frame into position. Attach it using brackets and screws. Use a spirit level to keep everything aligned. Ensure all fittings are secure and the structure is stable.
These steps form the foundation of a solid screen that adds both function and style.
Tips for a Clean Finish
To ensure your louvre screen looks good and lasts long, follow these simple care and maintenance steps:
- Use weatherproof sealant on timber to avoid warping.
- Paint metal frames to prevent rust.
- Avoid direct contact with soil to extend lifespan.
- Wipe down blades regularly to prevent dirt buildup.
- Inspect the screen every few months and tighten any loose parts.
With regular upkeep, your louvre privacy screen will remain sturdy and visually appealing for years to come.
Benefits of Using a Louvre Screen
These screens are highly valued for their flexibility. You can enjoy privacy without losing daylight or airflow. The angled slats offer a sleek, modern look that blends well with most outdoor designs. They’re also helpful in defining zones within your garden or patio area.
Enhancing Outdoor Spaces Further
Pairing a screen with an insulated patio roof can transform a simple backyard into a year-round living space. While the screen offers privacy, an insulated patio roof adds shade and rain protection. This combination boosts comfort and property value. It also reduces exposure to the elements and makes entertaining guests much easier. Together, they provide a well-structured outdoor extension of your living area.
Conclusion
Installing a louvre screen is a practical DIY project that improves your home’s outdoor appeal. With patience and the right tools, you can enjoy greater privacy and comfort without professional help. It’s a great way to personalise your space while adding value to your property.